Ponds 102 Chapter 8
Make a Sketch to Scale

Once you decide on the profile of your pond, the next decision you need to make is how and when to measure for your liner and underlayment. There are two ways to go. Most folks want to know what size liner to order first, before excavating, to figure costs. On the other hand, some people like to actually complete the excavation before measuring for the liner. That way the occasional cave-in, “oops” or even sheer shoveling exuberance won’t leave you with too much hole and too little liner. Remember, it’s easy to overdig, but mighty hard to shrink a hole. Either way, an accurate sketch, to scale, goes a long way towards great final results.
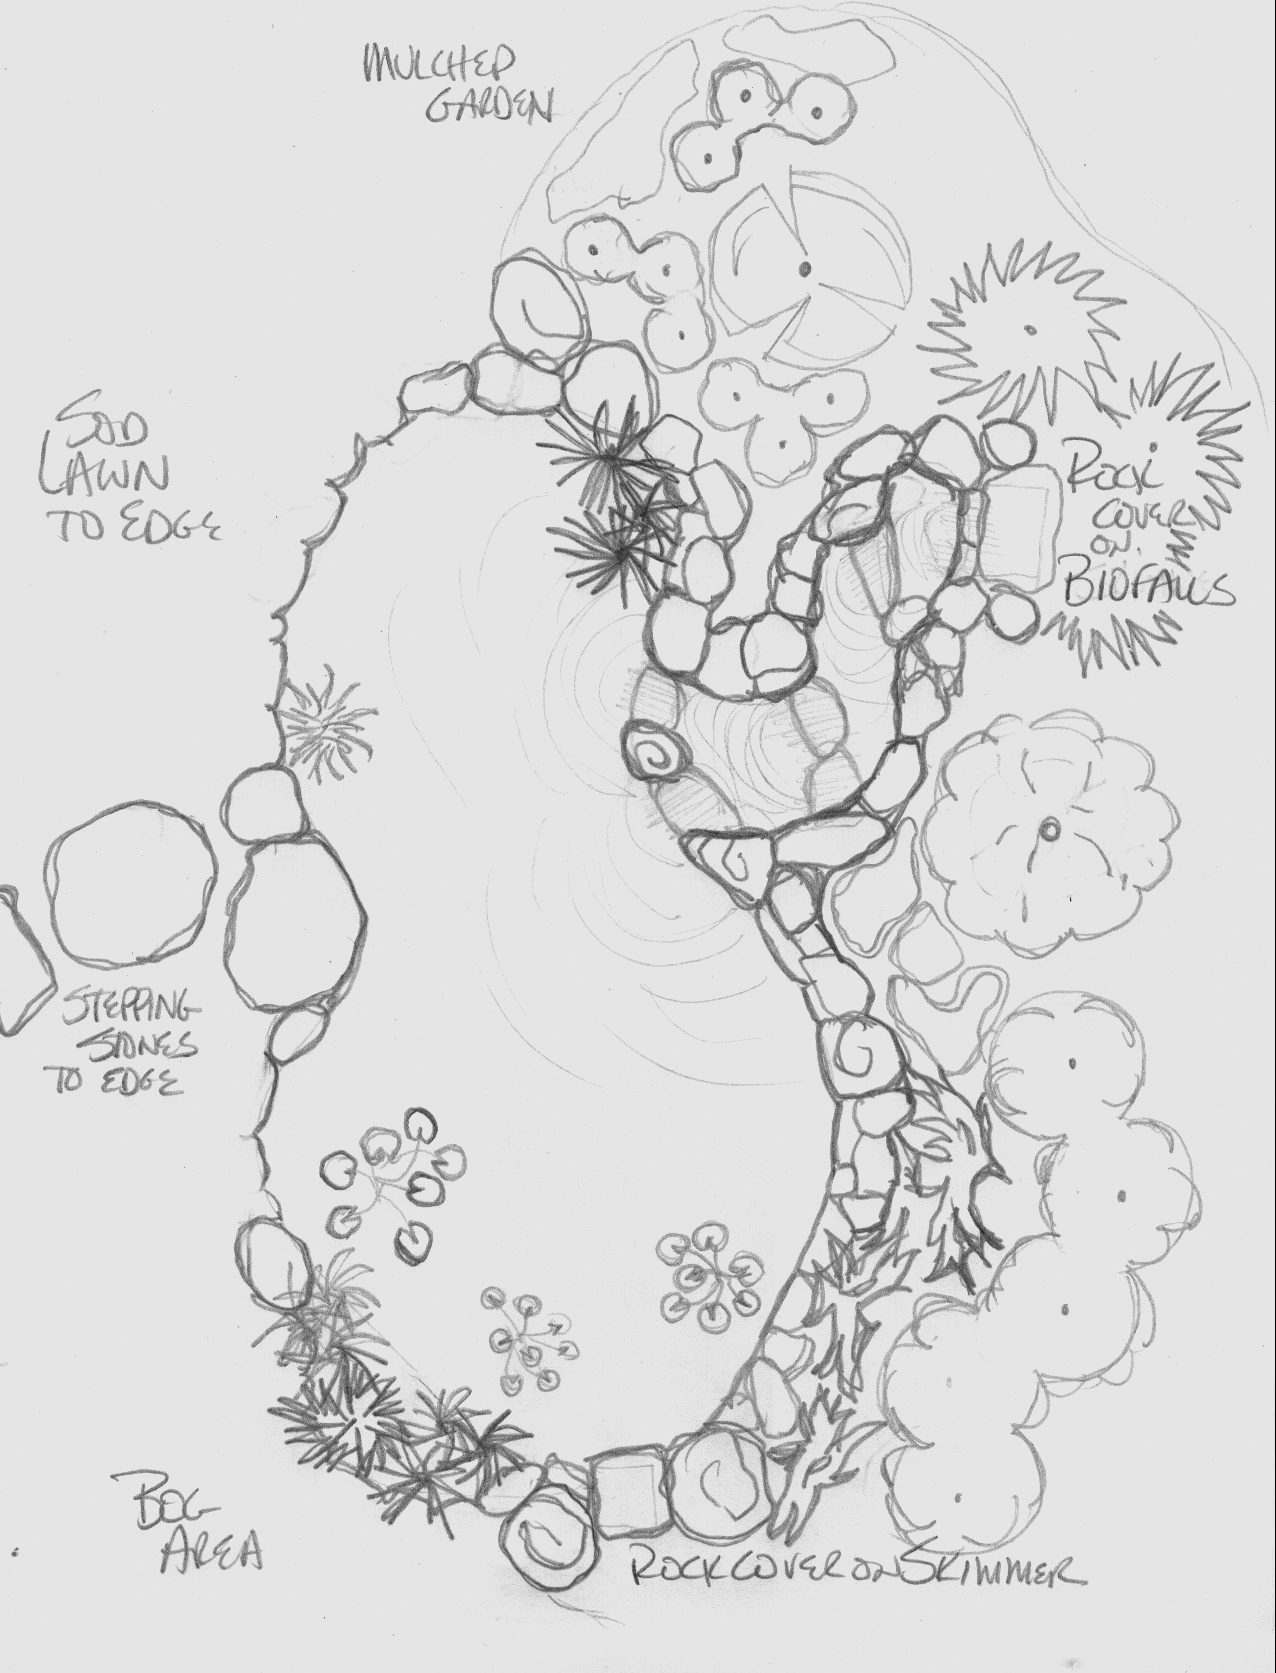
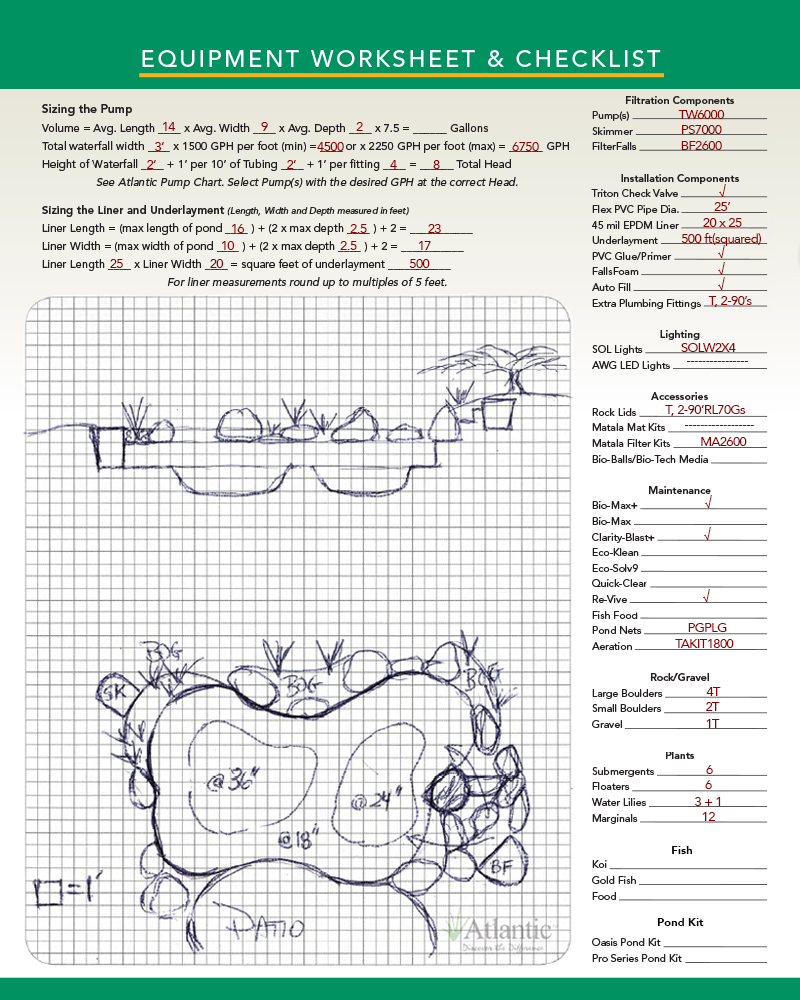
Start by sketching out the pond (and stream if you’re building one), to scale, on a piece of graph paper. (Hint: make copies of the different stages as you go – it’s easier to go back to an earlier copy than to erase changes!) Begin with the outline of the water’s surface, then add the various features you want around the pond –waterfall or stream, plantings, a bench or sitting rock, stepping stones, a bridge, patio – whatever you want, put it in the drawing. Make sure to include the stones around the perimeter of the pond, to scale, since the liner will actually go around the outside of those ‘coping’ stones.
Pro Tip: when it comes to locating the skimmer, consider setting it back a foot or two (or more) from the water’s edge. The farther back it is, the easier it will be to hide. Just leave the shelf directly in front of the skimmer open, to let water flow unobstructed into the skimmer mouth, and bring your rocks around to either side, in effect recessing the skimmer. If you place bog plantings on either side of the opening you’ve left, you’ll find it’s pretty easy to disappear the skimmer completely, all you’ll see are the plants. On that note, when considering planting areas, keep in mind that the pond liner will be a perfect rectangle, so a gently rounded shape to the pond will leave you excess liner in the corners that you can use to create perimeter bogs. You’ll also want to draw the shelves inside the pond and note the maximum depth; those steps down to the deepest point eat up liner too. You might find the graph paper worksheet on Atlantic Water Gardens Let’s Talk Ponds! Trifold helpful, also available at your local Water Gardening Center, or download online at www.AtlanticWaterGardens.com.


